As a homeowner, there’s always something that needs fixing or updating in your home. While some repairs may require professional help, there are many tasks you can tackle on your own, even if you have little or no experience with DIY projects. Not only can doing these repairs yourself save you money, but it can also give you a sense of accomplishment and pride in your home. Here are 10 DIY home repairs you can tackle on your own.
1. Fix a Leaky Faucet
Normally anything to do with plumbing should be done by a licensed professional. But fixing a dripping faucet is one of the most common DIY home repairs that can be done easily with a few basic tools.
- Turn off the water supply under the sink and close the drain stopper to prevent any small parts from falling down the drain.
- Remove the handle and the cap to access the internal parts of the faucet.
- Identify the cause of the leak, which is often a worn out washer or O-ring.
- Remove the old part and replace it with a new one, making sure it fits correctly.
- Reassemble the faucet and turn on the water supply to test if the leak has been fixed.
This is one area that you can try to tackle on your own. Eliminating that constant drip that wastes water can be attempted by you first.
2. Replace a Toilet Flapper
A running toilet can waste gallons of water each day. The culprit is usually a worn-out toilet flapper. Replacing the flapper is an easy fix that will save you money on your water bill. Here are the simple steps:
- Turn off the water supply valve behind the toilet and flush the toilet to empty the tank.
- Remove the old flapper from the flush valve assembly by unhooking it from the chain and sliding it off.
- Take the old flapper to the hardware store to find a matching replacement.
- Install the new flapper by sliding it onto the flush valve and attaching it to the chain.
- Adjust the chain length to ensure the flapper closes tightly after each flush.
- Turn on the water supply and test the flush to ensure the flapper is sealing properly.
Replacing a toilet flapper is a quick and easy fix that can save you money on your water bill and prevent water waste.
3. Patch a Hole in the Wall
Whether it’s from a doorknob or an accidental bump, holes in the wall are unsightly. Fortunately, patching a hole is a quick and easy repair. All you need is some spackle, a putty knife, and sandpaper and follow the following steps:
- Clean the area around the hole and remove any loose debris or old drywall.
- Cut a piece of drywall or a drywall patch slightly larger than the hole.
- Place the patch over the hole and trace its outline onto the wall.
- Use a drywall saw to cut along the traced line, creating a hole the same size as the patch.
- Place the patch in the hole and secure it with drywall screws.
- Cover the screws and the seams with joint compound, using a putty knife to spread it evenly. Let the compound dry completely, then sand it down to a smooth finish.
- Repeat the process until the surface is even and flush with the wall. Finally, paint over the patch to match the color of the surrounding wall.
Patching a hole in your wall is one task that most homeowners can accomplish without too many problems. It does depend on the size of the hole and whether you can use a drywall saw safely. If not, call a handyman to fix the problem.
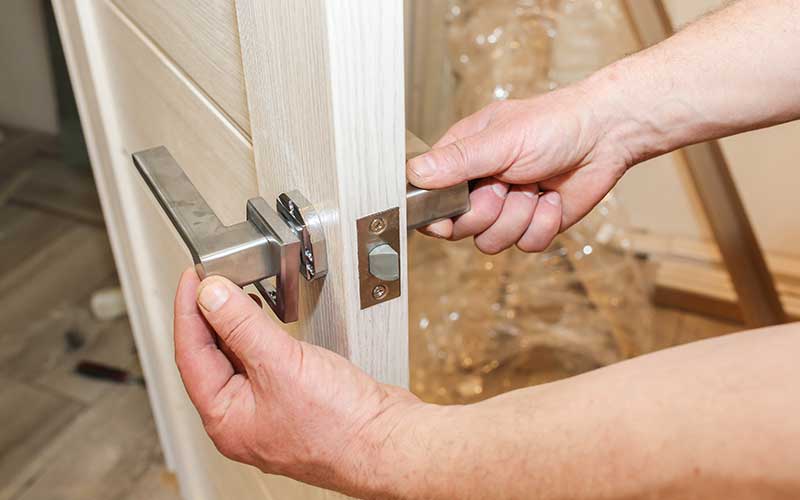
4. Replace a Door Knob or Lock
Replacing a door knob or lock is another one of the simple DIY home repairs that can improve security and update the look of your home.
- Remove the old knob or lock by unscrewing the screws holding it in place. Take note of the orientation of the latch and strike plate to ensure proper alignment of the new knob or lock.
- Install the new latch or lock mechanism, attaching it with screws provided.
- Attach the new knobs or levers on both sides of the door, inserting the spindle through the latch and securing it with screws.
- Test the new knob or lock to ensure it is working properly. If necessary, adjust the strike plate for a snug fit.
Inspect your entry door locks to be sure they are high quality. Then replace those that are not and increase the security of your home.
5. Fix a Squeaky Door
A squeaky door can be annoying, but it’s an easy fix. This easy DIY project can make a big difference in the comfort and noise level of your home.
- Identify the location of the squeak by slowly opening and closing the door.
- Remove the hinge pins one at a time, using a flat-head screwdriver to gently tap them upward.
- Clean the pins and hinges with a rag, then apply a small amount of lubricant, such as WD-40 or a silicone spray, to the pins and hinges.
- Reinsert the pins and test the door to see if the squeak has been eliminated.
- If the door still squeaks, try tightening the screws in the hinges or adding a thin piece of cardboard or felt between the hinges to reduce friction.
All homeowners should have some WD-40 lubricant in the house for task like these. No one likes creaky doors and taking on this project is a simple task.
6. Caulk Around Windows and Doors
Caulking around windows and doors is an important project that can improve energy efficiency, reduce drafts, and prevent water damage.
- Start by removing any old caulk or debris from the area with a putty knife or caulk removal tool.
- Clean the area with soap and water and allow it to dry completely.
- Cut the tip of the caulk tube at a 45-degree angle and apply the caulk in a continuous bead, using a caulking gun to control the flow.
- Smooth the caulk with a caulk smoothing tool or your finger, removing any excess and ensuring a tight seal.
- Allow the caulk to dry for at least 24 hours before painting or exposing it to water.
Sealing your windows and doors can help keep your home comfortable whether it is summer or winter. Letting hot air in the summer and cold air in the winter into your home makes your HVAC system work harder to keep the temperatures constant.
7. Replace a Screen
A torn or damaged window or door screen can let in bugs and other unwanted guests. Fortunately, replacing a screen is an easy DIY project that can improve the appearance and functionality of your windows or doors.
- Remove the damaged screen by gently prying it out of the frame with a flat-head screwdriver or a screen removal tool.
- Measure the dimensions of the frame to ensure the replacement screen fits properly.
- Cut the new screen to size, leaving an extra inch on all sides.
- Place the screen over the frame and secure it with a spline, using a spline roller to press it into the groove.
- Trim the excess screen with a utility knife, making sure to leave a small overlap.
No one likes to have bugs enter their home through a broken or torn screen. Grab some replacement screen at your local hardware store and take care of the problem quickly.
8. Paint a Room
Painting a room is a DIY home repair project that can transform the look and feel of any space. While it can be time-consuming, it’s a project that most homeowners can handle on their own.
- Prepare the room, removing any furniture or décor and laying down drop cloths to protect the floors.
- Fill any holes or cracks in the walls with spackling paste, allowing it to dry and sanding it smooth.
- Apply painter’s tape to any edges or trim that you don’t want to get paint on.
- Choose your paint and purchase enough for the room, using a paint calculator to estimate the amount needed.
- Start by painting the edges and corners with a brush, then use a roller to fill in the larger areas with even strokes.
- Allow the first coat to dry completely before applying a second coat if necessary.
- Once the paint is dry, remove the tape and replace any furniture or décor.
A nice coat of fresh paint can transform your room into a new look. This is one project that homeowners can do with pride.
9. Install a New Showerhead
Installing a new showerhead is an easy and affordable DIY project that can upgrade your bathroom and improve your daily shower experience. Most showerheads simply screw on, making it a quick and easy project. Here are a few more details.
- Turn off the water supply to the shower.
- Remove the old showerhead by unscrewing it from the pipe with pliers or an adjustable wrench.
- Clean the threads of the pipe with a rag and wrap them with Teflon tape.
- Screw the new showerhead onto the pipe, tightening it by hand and then using pliers or a wrench for a final turn.
- Turn on the water supply and test the new showerhead for any leaks or drips. If necessary, adjust the showerhead to your desired angle or height.
With a few basic tools and some attention to detail, installing a new showerhead can be a quick and satisfying DIY project.
10. Replace a light fixture
If you’re tired of your old light fixtures, you can easily swap them out for new ones. Replacing a light fixture is a relatively easy DIY project that can give a fresh look to any room.
- Start by turning off the power to the fixture at the breaker box and removing the old fixture.
- Carefully disconnect the wires, taking note of which wires are connected to each other and how they are connected.
- Install the mounting bracket for the new fixture and attach the wires from the new fixture to the corresponding wires in the electrical box, using wire nuts to secure them.
- Carefully tuck the wires into the box and attach the fixture to the bracket.
- Turn the power back on and test the new fixture to ensure it is working properly.
With some basic tools and caution, replacing a light fixture can be a satisfying and rewarding DIY project. However if you have any doubts, hire an electrician to replace your light fixtures.
Which task will you tackle first?
There are many home repairs that owners can do themselves with a little bit of DIY knowledge and effort. Not only will tackling these projects save you money, but it will also give you a sense of accomplishment and pride in your home. Just remember to take safety precautions, follow instructions carefully, and don’t be afraid to ask for help if you need it, especially those related to electrical or plumbing systems, should be left to the professionals to avoid injury or damage to your home.